Greg’s Garden written by Greg and Mari Miller
The First Harvests Are Done, What is Next?
We ate the last of the fresh lettuce, spinach, and bok choy over the weekend. There remains barely one more meal of swiss chard in our garden plots. The cabbage are making their heads now, slowly curving their leaves to form the ball that will become a solid cabbage head in another 8 weeks. The cauliflower have just started to make small heads about the size of a nickel and Greg is watching them closely so he will know when to close up the leaves so the cauliflower heads will be protected from the harsh sun for the last of their growing season. I picked two large bunches of broccoli, which I made into a small salad with raisins, celery and walnuts. Then I picked a few small stalks of rhubarb to nibble on as I checked on the other vegetables. Rhubarb is one of the tastes of my youth in northern Indiana. Most gardens up north have rhubarb growing, even grows wild along some of the old country roads. But I have always liked rhubarb best cut straight from the garden, washed by the hose in the yard, and then nibbled as I went about my morning chores. Greg won’t touch it if it is raw, so it is truly my own to enjoy.
Greg says that the beets are going nicely now that he has thinned them out to fewer to each row. We look forward to canning them later this summer as pickled beets to enjoy in the winter. He finished the rototilling of the front garden and has now planted the remaining corn and bush green beans. These will be last of our harvest in the early to mid-fall. He has spaced out the planting to about 2-3 weeks apart for the three harvests of corn and beans. This will allow me plenty of time to can the beans and freeze the corn in batches while still working at my day job. Greg takes care of the planting and weeding but I have always enjoyed doing the canning. It is a great sensation to watch my cabinets in my utility room fill with beans, tomatoes, beets, corn relish, dill & sweet pickles, and of course the traditional “End of Garden” mix that contains just about whatever we want to throw into it. End of Garden is a pickled blend of the last of your garden vegetables, usually consisting of cauliflower, corn, carrots, small white onions, and bell peppers but, many versions exist so as to accommodate many tastes.
The tomato plants in the hanging pots are very tall now with new blooms showing. The lemon cucumbers have blooms as well. Parsnips and carrots are thickening so much that slightly moving the soil from the around the stems show pale tops of ½ inch or more. This is a good sign that they are thickening under the ground as needed. Root vegetables are the slowest growing in the garden but tend to rot if not watched closely. Greg hand waters these plants in his plots and watches them so that the soil does not get too moist.
Speaking of watering, with the hot Carolina summer coming on now, it is a good time to remember when to water garden plants and when to NOT! Never water your garden after mid-morning as this will cause the water to steam with the afternoon heat. The result will be wilted plants and some irreversible damage to the plant itself. Greg always waters the garden in the very early morning, sometimes before breakfast due to the large garden plots that all need to be watered. If rain is forecast and you think it really is a sure thing, don’t water your garden plots. You can always water again the next morning if no rain falls, but too much watering is not good for most garden plants. So error on the side of caution.
Now that the “greens” are done for the spring season, what do we do next? Well, we watch our other vegetables as they grow and keep up with the next batch prepping for our first harvest that will be canned and put up for winter use. These plants are the tomatoes and beans. Greg planted both Roma and Early Girl tomato plants from seed this year. I added some multi-colored smaller tomato plants to have for salsa and salads. When the Roma tomatoes are harvested I will make my own spaghetti sauce and tomato sauces. The Early Girl tomatoes will become jars of whole tomatoes to use for soups and stews. The green beans in the front garden are in spaced batches but will also be ready for canning by mid-summer, so it will be a busy July and August around our home. For now we watch and water and keep the bugs at bay. Greg stays on top of the insects with a store bought liquid Sevin concentrate spray. He has found that the spray holds to the plants better than the powdered version.
Easy Strawberry Jam
As promised, I did make strawberry jam this weekend. I have many cookbooks (more than Greg wishes I had, but helpful for all of those special recipes he likes in the winter) and one of my oldest cookbooks my mom gave me had many easy jam and jelly recipes. I used the Strawberry Jam recipe this past Saturday and made 9 pints of jam. I will make some jellies later in the fall when my grapes are ready to make juice.
I have included some pictures below that show the limited items needed and the final product.

As you can see in the first picture I used only Strawberries, sugar, and lemon juice for the recipe.
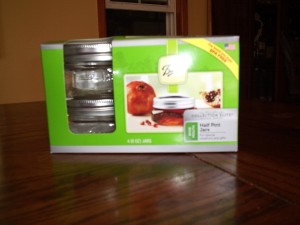 In the second picture I show the style of canning jar I used. These are half-pint (8 ounces each) and a bit wider than usual jelly jars, but I like the wide mouth for ladling in the jam. Fewer spills make fewer cleanups and that makes a quicker job all around.
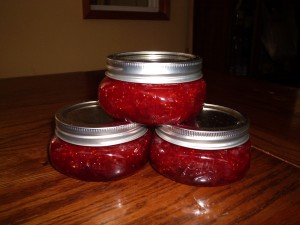 In the last picture I show the finished jam. From start to finish I took less than 2 hours but of course this is not my first time making jam, so do allow yourself a full afternoon to produce jam of your own.
Before starting the cooking of the jam, prepare the jars for canning if you will want these to put up for several months. Otherwise, you will have to refrigerate the jam. If canning, wash jars thoroughly in hot sudsy water and rinse in hot tap water. Place face down on a cookie sheet that is covered with a clean kitchen towel. Cover the jars with another towel and set aside until needed. To prepare lids, place lids into a small saucepan with about 2 inches of water. Make sure that the water covers the lids by at least one inch. Bring this to a boil then set aside until the lids are needed. Look over the bands of the jars (even if brand new jars have been purchased) for any nicks or bends in the bands, as this will keep the lids from fully sealing. Now you are ready to proceed to make your jam.
Below are the recipe and the ingredients listing:
EASY STRAWBERRY JAM
Ingredients:
4 Cups Crushed Berries (about 3 pounds of fresh strawberries, store bought is just fine)
7 Cups Granulated Sugar
¼ Cup Lemon Juice (can be fresh or from a jar, no difference)
7-8 Half-Pint Jelly Jars (wide mouth or regular mouth, no difference)
Step One:
In a large 6-8 quart heavy stock pot, crush the berries in batches until all are blended into a course mixture. Measure out 4 cups of berries and set aside in a large mixing bowl. Remove all remaining crushed berries from the stock pot and save for another use (maybe in jello or on top of ice cream).
Step Two:
Return the 4 cups of berries to the stock pot, adding the sugar and lemon juice. Stir until well mixed. Bring to a boil that will not be stirred down by a spoon. This is a full rolling boil. Cook at a full boil for 2-3 minutes stirring constantly. Remove from heat.
Step Three:
Skim off the foam if needed and then proceed to fill the jars to within ¼ inch of top of rim. With a damp cloth wipe the edges of the jars to remove any jam or fruit. This will assist in a good seal for the lids. Immediately, place the lids on the jars and tighten with the bands. Use hand strength for a good seal. Be Careful. You will need to use a towel to handle the jars as they will be very hot. I tend to let Greg tighten these as my hand strength is not as good as it used to be. When each jar has lid and band secured, place back onto the cookie sheet then cover all with a heavy hand towel.
Cool for about 12 hours or overnight. If not using for long storage these can be placed in the refrigerator until further use. Lasts in fridge about a month. If canning for long term storage, read on.
WATER BATH CANNING FOR JAMS AND JELLIES:
Prepare a large heavy 8 quart stock pot for use as an open water bath canner. You can reuse the stock pot that was used for the jam, just fully wash and dry first. Place about 4-5 jars in the bottom of the stock pot and add enough water to fully cover the jars by one to two inches. Then bring the water to a full boil, turn down heat to medium high so that the water continues to boil but at a softer pace. Cover pot and continue to boil for 10-12 minutes. Then remove jars and place back onto the towel lined cookie sheet. Top with a heavy kitchen towel. Tuck the sides of the towel close to the jars so they are snug. Check the jars for proper seal in about 24hrs. Lids should not give at all to the touch. You will hear periodic popping of the lids as they seal. If any do not seal, these must be refrigerated until used.
Look for a full picture layout in our next issue that shows all of the current progress of our garden items and a few secrets of gardening!
In our next issue on June 16th:
-
Pictures of the blooming garden
-
A few Summer Supper recipes
-
When to cage the tomato plants and stake the beans
See you in 2 weeks!